Adding a Clearance
You can assign a Clearance to a Personnel record from either Personnel Search or the Web Client Personnel Clearances tab.
To Add a Clearance from Personnel Search
|
1.
|
Navigate to Personnel Search by clicking Personnel on the Web Client Toolbar. |
|
2.
|
Search for the Personnel record to which you want to add a Clearance (see Search for Personnel. Searching for Personnel), or just click Refresh to see a list of all Personnel and scroll to the Personnel record. |
|
3.
|
Click the Personnel Record to which you want to add a Clearance. If you want to add a Clearance to more than one Personnel record, you can use CTRL+Left-click to select additional records. You can select a range of records using SHIFT+Left-click. |
|
4.
|
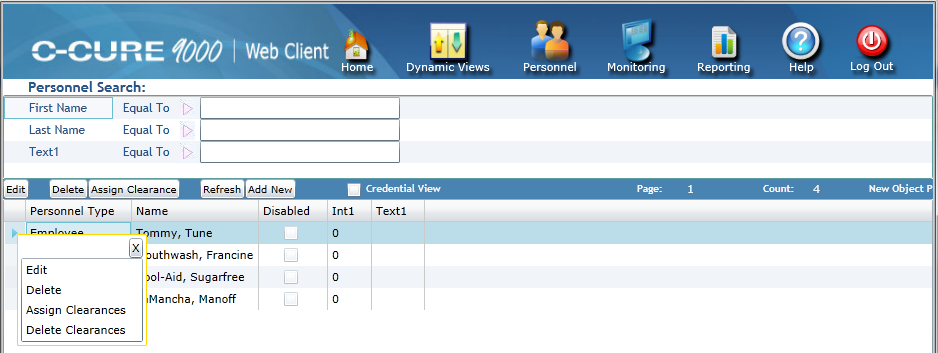
Select Assign Clearances from the Context menu that appears. |
Figure 12: Personnel Context Menu

|
5.
|
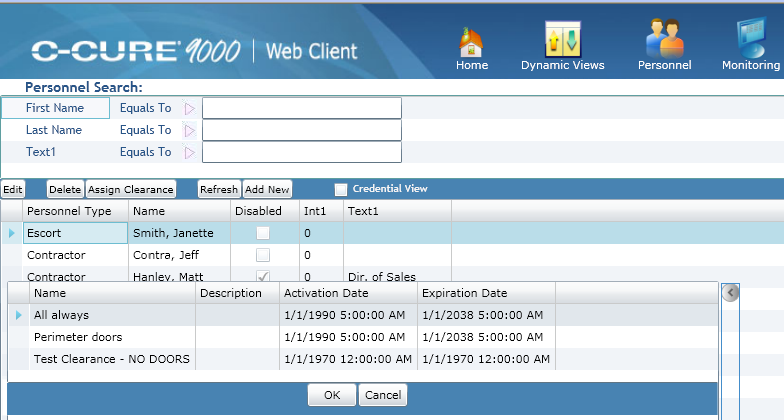
Select the Clearance you wish to add from the list of Clearances that appears (see Figure 13). |
Figure 13: Personnel Clearance Selection Popup

|
7.
|
Click Save to save your changes. |
To Add a Clearance from the Personnel Clearance Tab
|
1.
|
Navigate to Personnel Search by clicking Personnel on the Web Client Toolbar. |
|
2.
|
Search for the Personnel record to which you want to add a Clearance ( Search for Personnel), or just click Refresh to see a list of all Personnel and scroll to the Personnel record. |
|
3.
|
Click on the Personnel Record to which you want to add a Clearance. |
|
4.
|
Select Edit from the Context menu that appears. |
|
5.
|
Click on the Personnel Clearances tab. |
|
7.
|
Select the Clearance you wish to add from the list of Clearances that appears. |
|
9.
|
Click Save to save your changes. |


